This tutorial will guide you how to add an image and video slideshow created with Amazing Slider to your Homestead website.
There are four steps in this tutorial.
Step 1 – Create a standalone folder for your slider in Homestead file manager
Login your Homestead account, select the website you want to add the slider, then launch the SiteBuilder.
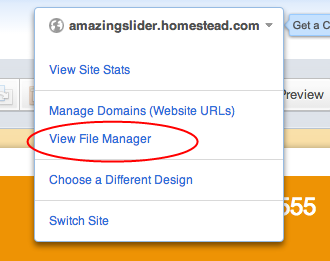
In SiteBuilder, click the arrow on the right side of your website name, then choose View File Manager.
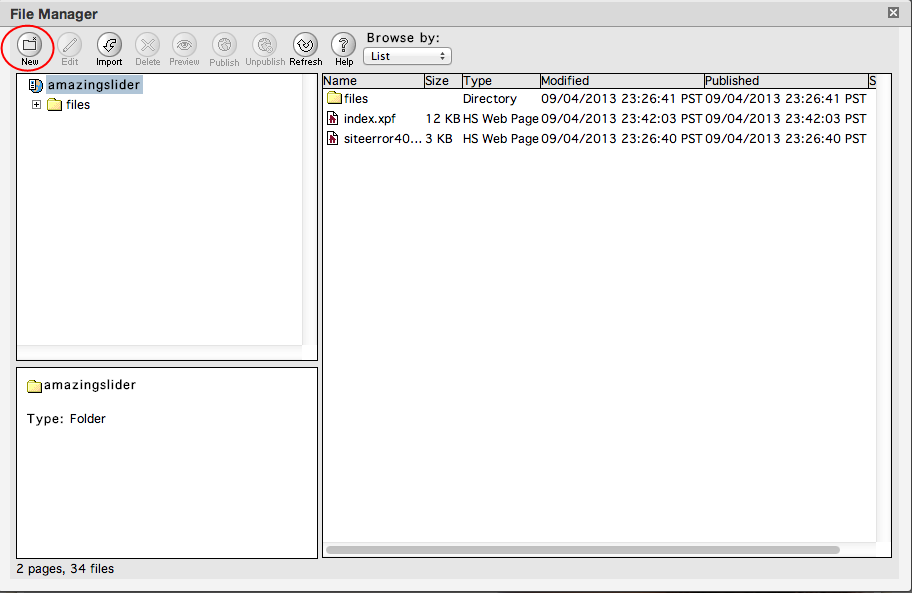
In File Manager, click button New, then in the popup dialog, enter a folder name you like, for example homeslider. We will use this folder name in following steps.
Step 2 – Create and publish the jQuery slider in Amazing Slider
When preparing the images, only use a-z, A-Z and 0-9 for the image filename. Special characters, for example, space , & . may cause problems.
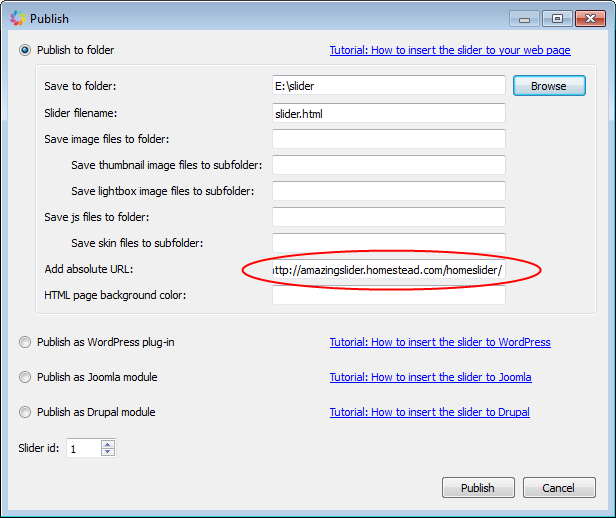
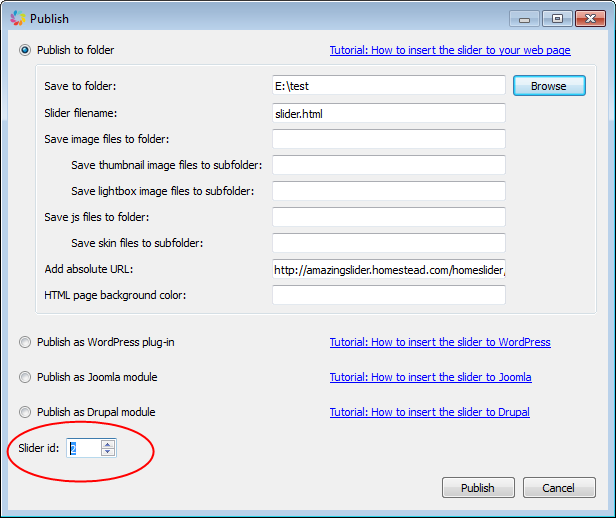
In Amazing Slider, create a jQuery slider. Then click button Publish, in the Publish dialog:
- Choose a local folder to save the slider files
- Delete the default value in the text field “Save images to folder” and “Save js files to folder”
- In “Add absolute URL”, enter http://amazingslider.homestead.com/homeslider/. You need to replace the http://amazingslider.homestead.com with your own domain name. The homeslider is the folder name we created in step 1.
Step 3 – Upload the slider files to your server in Homestead file manager
In your Homestead account, go back to File Manager, select the folder homeslider that we created in step 1, then click button Import from the top toolbar. Navigate to the local folder where you saved the slider files in step 2, then choose all files and import them. Homestead File Manager supports importing multiple files, so you can press Ctrl/Shift key or drag your mouse to select multiple files and import them at once.
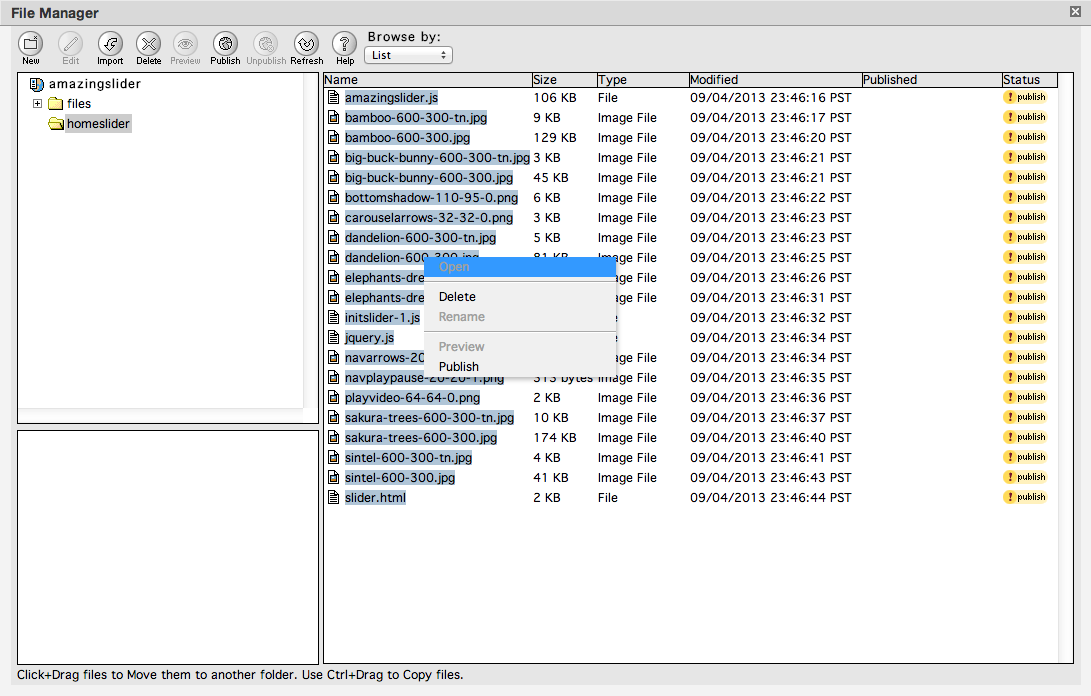
Now, all slider files have been imported to Homestead File Manager. In File manager, you can select the files then click button Publish, or you can right click the files, and choose Publish from the popup menu.
Step 4 – Insert HTML codes to your webpage
Open your web browser and visit http://amazingslider.homestead.com/homeslider/slider.html. You need to change http://amazingslider.homestead.com to your own domain name. homeslider is the folder name we created in step 1.
The slider should work correctly in this page. If it does not show up or does not work correctly, you need to go back and check whether you have followed each step correctly.
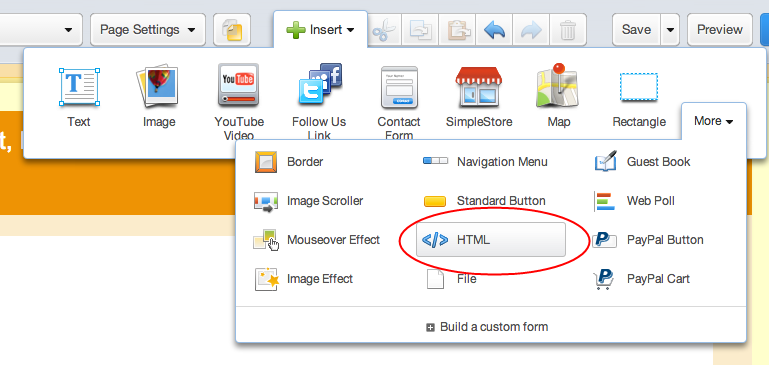
In SiteBuilder, go to the webpage you want to insert the image slider, then choose Insert -> More -> HTML.
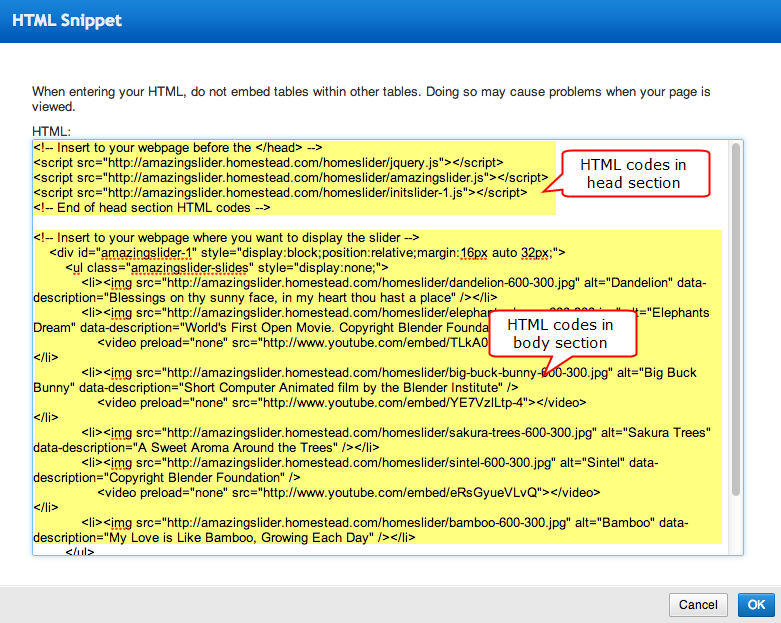
Open the created slider.html file with a text or HTML editor, copy the HTML codes from the file to the SiteBuilder HTML Snippet box.
There are two parts of HTML codes in slider.html: one in head section, another one in body section. You need to copy both snippets to here.
Adjust the position of the HTML snippet box and publish your website.
Adding multiple sliders to one page
If you want to add multiple sliders to one web page, when creating the slider, in the application, Publish dialog, you need to configure a different “Slider id” for each slider.
When inserting the HTML code to your web page, for the second and after sliders, you also need to remove the following two lines from the head section codes:
<script src=”http://amazingslider.homestead.com/homeslider/jquery.js”></script>
<script src=”http://amazingslider.homestead.com/homeslider/amazingslider.js”></script>
It’s because these two lines have already been added by the first slider. There may be a problem if the codes are added more than one times.