This tutorial will guide you how to insert jQuery sliders to your Drupal website
Step 1 – Create Drupal jQuery slider module in Amazing Slider
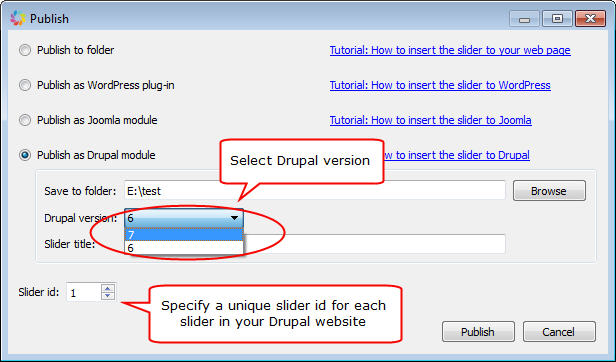
In Amazing Slider, you can publish the created jQuery slider to a Drupal 6 or Drupal 7 module.
In Publish dialog, choose the option Publish as Drupal module, then you need to:
- Select a folder to save the Drupal module
- Choose Drupal version
- If you have multiple sliders in your Drupal website, you need to specify a unique id for each slider

Step 2 – Install the created Drupal jQuery slider module to your website
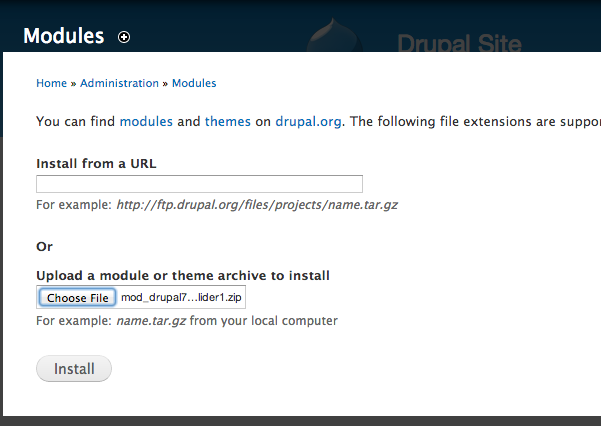
Login the administration area of your Drupal website, click Modules from the top menu, then click the link Install new module.
Select the file created in step 1, click Install. If the installation is installed successfully, go back to the Modules page, check the ENABLED option of the Amazing Slider module, and click the button Save Configuration.

Step 3 – Insert the jQuery slider to your website theme
To display the jQuery slider to your website theme, you can add the following PHP codes to your theme file:
<?php echo amazingslider1_output(); ?>
If you have chosen a different slider id in step 1, you need to change the number in the above codes accordingly. For example, if the id of the slider is 3, you need to use codes:
<?php echo amazingslider3_output(); ?>
Step 4 – Insert the jQuery slider to your Drupal page or article
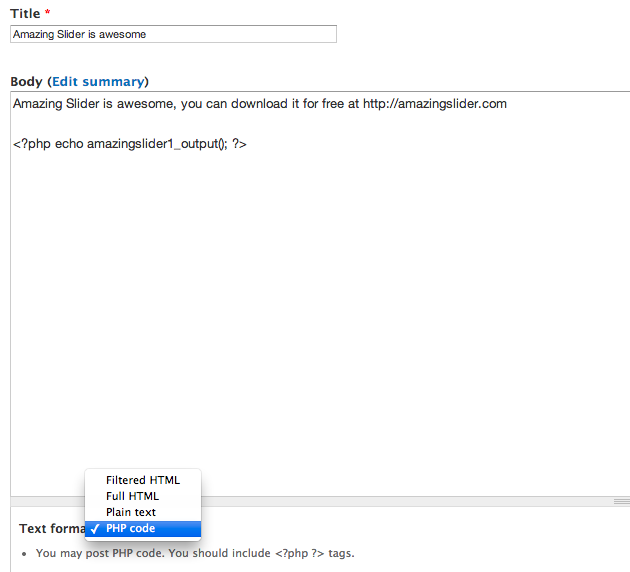
To insert the slider to your Drupal page or article, in the Dashboard, click Modules from the top menu, then enable “PHP filter” module.
Then in the page editor, find the dropbox menu “Text format” and change its value to “PHP code”.
You can then enter the PHP code to embed the slider to your Drupal page:
<?php echo amazingslider1_output(); ?>
